Showing posts with label Recipes. Show all posts

Monday, December 30, 2013

Green Smoothie Cubes (How to)


How to make green smoothie cubes! 


 The article I mentioned in the video can be found right here. Sums up greatly why it's important to steam your greens and consume them with a healthy fat. 

Tuesday, December 17, 2013

Cranberry Orange Loaf (Grain/dairy/gluten Free and Paleo)


My photos are not the greatest at giving this cake/loaf what it deserves. This is by far my favorite paleo baked good I have tried so far. Very yummy and it's not even noticeable that it's grain-free! 


Mackynzie devoured this, and told me it was 'super delicious' It was really easy to throw together, and absolutely something you could bring to a family gathering. 

Let me know how it turned out if you try it!  


Sunday, December 1, 2013

Recipe Update: chicken soup and bone broth


 I posted my original bone broth and chicken veggie soup recipe almost two years ago. Now that I am further down our holistic food journey, my recipe  has changed a bit. So here are the things I have changed only. For step by step instructions, visit the original post and swap out the following things.


For the Broth:

I highly suggest cooking the broth for several hours. Typically, I throw it on the stove to simmer on low all day, put it outside at night (thanks to winter right now.) and then continue simmering for a more few hours. On the second day, you can choose to do as little as 2 hours or you can do it until evening.

Use lots of garlic.

Why so long?: The 'low and slow' method gives the bones optimal time to release all the nutrients and get to the marrow. Add 1-2 TBS of apple cider vinegar to help the calcium release from the bones. (Very important if you are cooking for holistic/optimal nutrition.)

 * I use this same 'recipe' for both chicken and beef bones. I prefer to use an Italian spice blend (a good size tbsp), and honestly I forget the bay leaf almost every time haha.

Again, to reap the many benefits of bone broth, low and slow is the way to go. You can not achieve the same benefits with a quick cook. The taste will be immensely better as well.

For the soup:

You can use my measurements for the veggies if you want, or eye ball your own! I use ALL BROTH if I can for optimal nutrition. I stick to the same cooking method, however I sometimes add organic brown rice noodles, and LOTS of fresh basil when serving.

 Use LOTS of garlic. Keep any illness or ailment away.

For spices, again I prefer an Italian spice blend, and sea salt and pepper. About a heaping TBSP of italian and a good amount of salt and pepper. Keep in mind you don't want too much salt and pepper in your pot, so people can omit or add to their own bowls.

any other questions, please ask away!

Thursday, October 3, 2013

Hearty Cold Weather Stew


   The cold weather is here, pumpkins are popping up everywhere, it could only mean one thing. Time to pull out the crock pot and make delicious hot dinners for the cold evenings. Not to mention that the whole being pregnant thing makes me not want to do a lot in the kitchen.

This recipe is completely clean eating friendly. Each ingredient is nutrient dense and hearty. It literally tastes like fall. Pair it with something pumpkin and sweet for desert and you have hit the fall eating jack pot. This is my favorite stew to date and I have been excitedly awaiting lunch time so I can eat leftovers. Make this, it's delicious.

This recipe is from Tosca Reno, however I changed a few things slightly to suit our family.

Get the recipe Here.

I changed/omitted the following ingredients:

* I chose not to coat the meat in the flour, and instead do what I usually do, which is cook the meat on a high heat to brown the outside and cook it about half+ way. (in coconut oil)

* Since I didn't do the flower mix, I added the seasonings to the whole stew. I used sea salt, pepper, and about a tablespoon  of Italian seasoning.

* I added a couple more carrots.

* I used 1 sweet potato instead of two, and replaced the second sweet potato with a large white potato.

* I did NOT add the nuts, as Cody has a nut allergy.

I did everything else to follow the recipe and changed only the above mentioned items. For those of you who have asked how I make stew It's exactly this, only this time I added the parsnips and sweet potato.

I hope you enjoy it! We certainly did.

Let me know how you liked it if you tried it, and if you changed anything!

Happy eating!

Wednesday, May 1, 2013

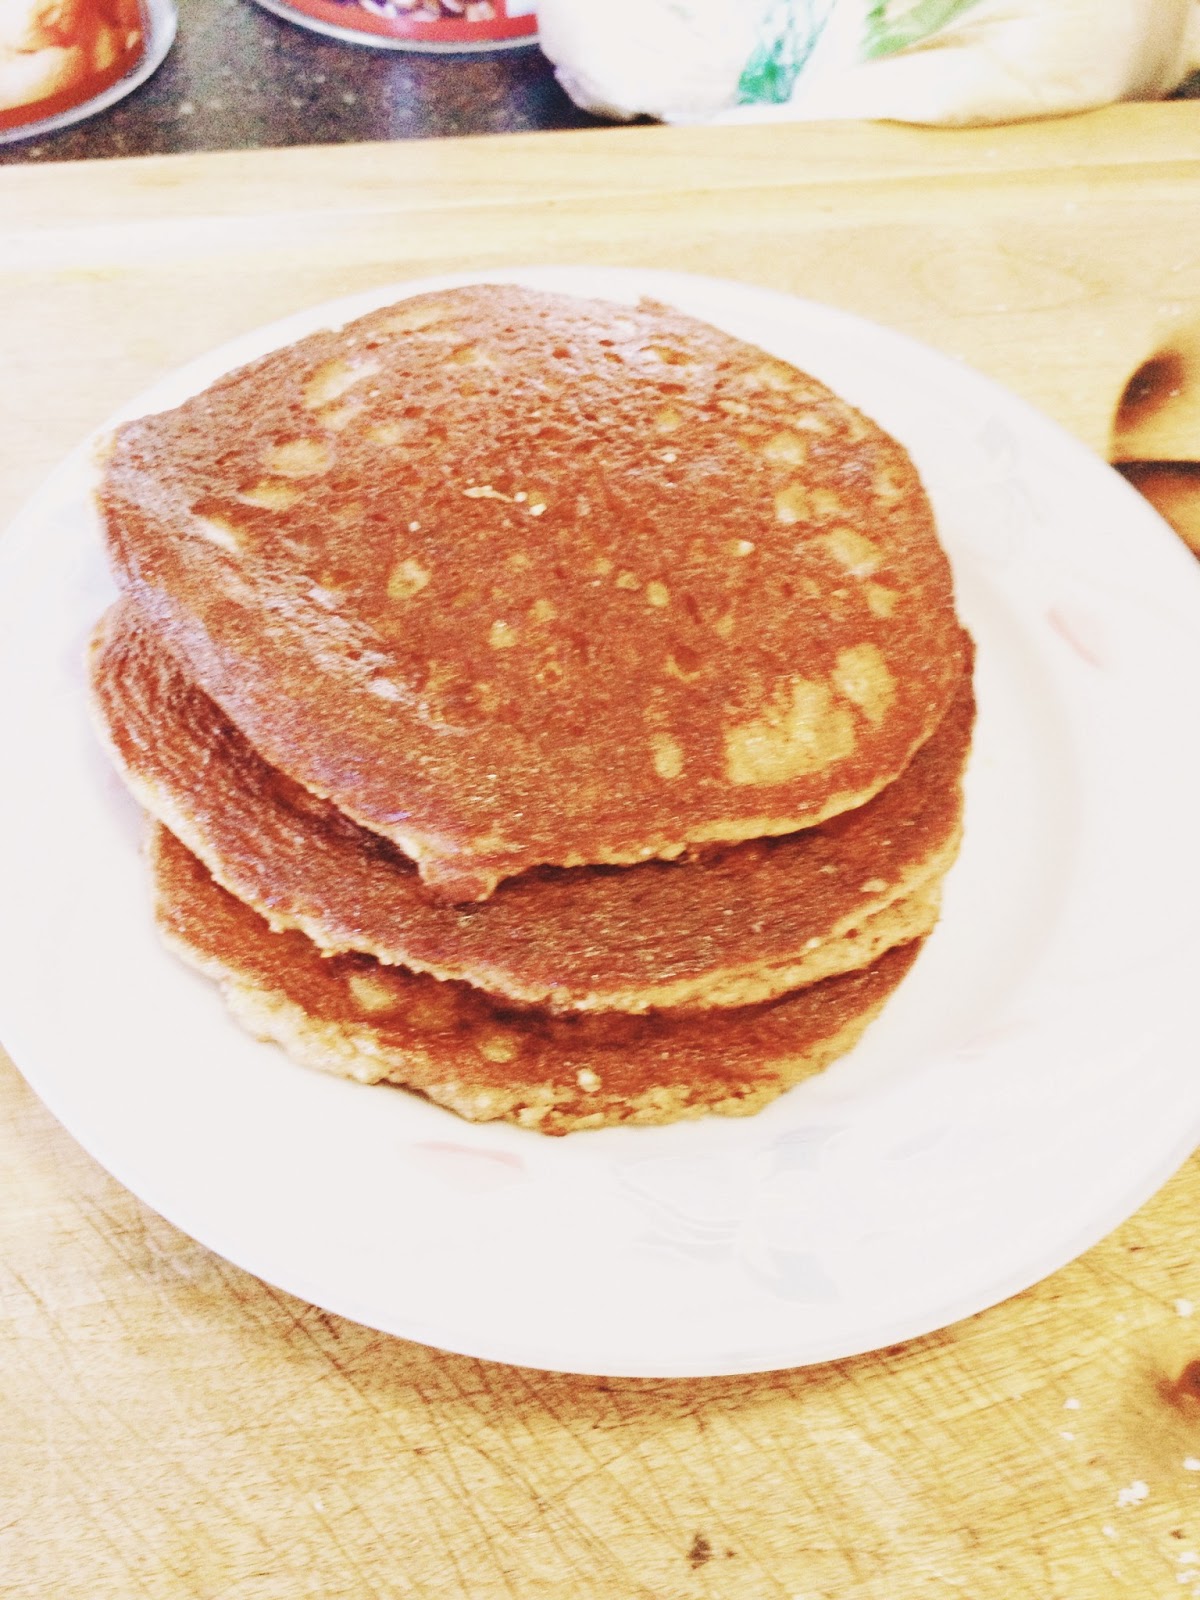
Almond Flour Pancakes


 I posted this picture on instagram:


 And said I would post the recipe if you wanted it. 

 These pancakes are super tasty! We have mostly avoided pancakes as primal peeps, because the ones I have tried have fallen short. And I really don`t like the texture and consistency of coconut flour, so I have never had success using it for pancakes or baking. I finally found some almond flour though, and this was the first thing I tried. 

They are delicious, pancake-sweet, and fluffy. they fill you up too. I recommend using a fine almond flour (I didn't. I used in between course and fine and they were still great.)

CLICK HERE for this recipe. 

Let me know what you thought if you make them. I think ill add a banana next time.


Thursday, April 18, 2013

Easy Chicken Dinner in One Pan


 So easy. Really yummy. Perfect lazy day dinner.

  • chicken breast
  • potatoes
  • green vegetable of choice (green beans, asparagus, broccoli, etc)
  • mushrooms (if you choose. or whatever may be in your fridge. Like peppers or chives or onions or thinly sliced carrot.)
  • butter (or coconut oil.)
  • sea salt
  • fresh pepper
  • Optional but yummy: fresh or dried parsley, dry oregano or an Italian mix. pinch of garlic powder.
 Throw together like shown. Pop in the oven at 350 for an hour (or shorter if your oven is hotter.). Done. Easy peasy. Makes you feel like you spent way more time on dinner then you did. 

Make things easier by spending an hour or so after buying groceries, washing and pre-cutting veggies and fruits so it's grab and go for your entire week!


Saturday, March 16, 2013

Paleo Banana Walnut Bread


 I started Paleo baking again. The good thing about paleo baking is that once you get the hang of it, everything follows similar principals, so unlike regular baking you can create your own recipes. 


 The verdict? This was good. It's mild and sweet and has good consistency and shape. However, I personally don't love coconut flour in my baking. I don't know, it's a texture thing for me. I am going to start baking with almond flour, because I feel like It would have a closer texture to what I am looking for. Despite all this, it was good, so go HERE for the recipe. (To spare me from having to re right it) I used walnuts instead and 3 bananas.

 Happy Saturday everyone!

Do you like coconut flour??

Thursday, March 14, 2013

Chocolate Chia Seed Pudding


Yummy chia seed pudding recipe with a step-by-step tutorial from an adorable little girl. This is Really good and satisfies a sweet tooth perfectly.

Ingredients:

*1 full can ( 11/2 cups) full fat coconut milk (shake it well)
*4 tbsp pure maple syrup or raw honey (keep in mind that honey doesn't mix well as is, it clumps, so if you're going to use it, heat it a bit.)
*1 tbsp vanilla extract
* 2 tbsp cocoa powder
*1/3 cup chia seeds.


Extras:
*Berries for topping
*keep this 'vanilla' by skipping the cocoa

Directions:

 Mix together coconut milk, syrup, vanilla and cocoa powder. pour in chia seeds and mix well. Let sit at room temperature for 2 hours if you wish to eat it soon, otherwise, chill in the fridge (covered tightly) for a few hours/overnight, but be sure to eat it within 24 hours.


This picture doesn't do it justice, so you will have to forgive me (it was late when it was ready.). It's creamy and perfectly chocolate. Make it, you won't regret it!

**note: this is not a smooth putting. More like a rice/tapioca consistency

I would totally tweak this to make into a moose like or freezer cake too. Om nom-wheels turning....

Thursday, January 24, 2013

Green breakfast/snack smoothie with avocado


Meal: Breakfast/Snack

Break down: (instructions) 1 avocado, 1-2 handfuls of spinach (steamed), 1 ripe banana, handful or two of ice, orange juice to cover half way up ingredients. Blend. If too thick, add more O.J and a splash of almond milk until desired thickness.

Info: This is something I make when I am not satisfied with my veggie intake (green veggies specifically.). Packed full of awesome nutrients and easy peasy. I add coconut water if I have it too.
Why steamed spinach? Almost all greens should be cooked before consumption or they can be quite harmful for your system and can inhibit iron absorption. I can post more info on this, or 'the healthy home economist' has a good post with a break down of info. 
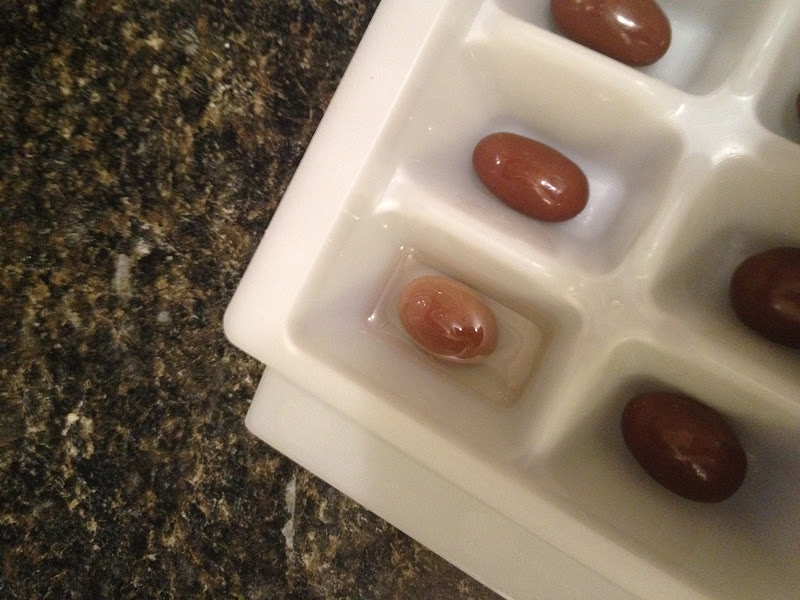
 To make this easier, I wash and steam ALL my spinach when I buy it, blend it together, and spoon/pour it into an ice cube tray and freeze it. Once frozen, I place into baggy and add 1-3 cubes to my smoothies. (I usually add 2.)

Friday, October 26, 2012

Food Friday: Very Easy Split Pea Soup


 It's Friday, Friday, gotta get down on Friday...

I now apologize for making you think of that terrible song. I will now make it up to you with an awesome recipe!


Split Pea Soup:

This recipe is so incredibly easy, quick and tasty! Mackynzie will eat an entire bowl of this, so that speaks for itself!


  • 8 cups water
  • 2 bullion cubes (we use veggie)
  • 1 cup dried split peas
  • salt and pepper to taste
Put all ingredients in a large pot and bring to a boil. once boiling, turn down and simmer for approximately 45 mins. Blend with emulsifier, top with Parmesan or cheddar cheese, fresh chopped cilantro, or nothing at all and serve. That's seriously how easy it is!

OPTIONAL additional ingredients:

  • 1 tbsp curry
  • 1 tbsp turmeric 
  • 3-5 medium sized carrots (chopped in large chunks)
  • spinach added in last 10 mins or so

Happy tummies!

Monday, September 17, 2012

Easy Pasta Sauce


I have always loved pasta. not for the noodles, but for the sauce. This recipe is super easy and I promise it's delicious!


  • 1 can pasta sauce of your choice (I use an organic herb one of some sort.)
  • 1 can tomato paste 
  • 1 large can crushed tomatoes
  • 1/2 to 1 finely chopped onion
  • 2 cloves garlic finely chopped
  • approx 1 Tbsp Italian seasoning 
  • approx 1/2 tsp salt
  • approx 1tsp black/fresh pepper
  • I also usually add some fresh herbs (sticking to things like oregano, parsley, etc)
  • 1 pound ground beef OR 1 cup cooked lentils for a meat free option
Directions:

Brown ground beef in pan. 
Saute garlic and onion together in either butter or oil (coconut works great)
pour pasta sauce, tomato paste, and tomatoes into large pot.
Add cooked beef or lentils to pot, along with sauteed garlic and onion, and seasonings.
Turn heat to medium high (around an 8) and let come to a bubble, stirring often. When it starts bubbling, reduce heat to low and simmer for at LEAST one hour. The longer it simmers the better it will taste.

Add more seasoning as needed while simmering.

That's why I love this so much. If I'm in a hurry, I cook it an hour, if I have time, I let it go for about 4 hours.

pour over pasta, rice, quinoa or do what I did as a kid- eat sauce with bread!

From my kitchen to yours,

Enjoy! 

Sunday, September 2, 2012

Chocolate Almond Freezer Bites


 This is one of Mackynzie and I's favorite treats. The bonus is that they are loaded with healthy fats and take almost no time to make. They are creamy, delicious, and you could replace the chocolate almond with anything, really. This is especially good for you pregnant mamas out there! 

Put almonds  in an ice cube tray.


Melt about 2 tablespoons (actual spoon) of coconut oil on the stove. (just until its melted!) and use spoon to pour oil over almonds. about half way up the almond.


Throw in freezer and they are ready in as little as 40 minutes.


Pop out of ice cube mold and put into bag or jar and put back into freezer.


 Snack on a couple a day and be prepared to always have these in your freezer.

Friday, August 31, 2012

Healthy Soft Serve


When it's hot and my sweet tooth goes nuts, this is one of my favorite quick things to make. Mackynzie goes bananas over it. It takes two seconds and is only 3 ingredients; frozen banana(s), cocoa powder, and a tiny bit of canned coconut milk (I added a little bit of vanilla). 


Om nom...

Wednesday, June 20, 2012

My version of vegan 'yogurt'


 I was looking for a quick, light snack or breakfast for those mornings when Mackynzie or myself just don't feel like eating much. I wanted it to still be nutritious and I soon found myself dreaming of being able to eat yogurt. It was the perfect solution in my mind, but the whole dairy thing was an issue. Then I remembered my love for coconut milk, and the versatility of coconut 'whip cream'. And with that, I give you:


 Rainbow's vegan 'yogurt'

I make them in single containers, so they are one serving. You can tweak the recipe to suit your desired serving size.


  • 1 can full fat coconut milk
  • 1-2 tsp (actual teaspoons you eat with) Organic jam OR purred/mashed fruit
  • 1-2 tsp organic apple sauce (if you want some texture. skip if you're looking for completely smooth.)
  • 1 single-serving container with lid
shake your coconut milk really well. you want to incorporate the water and cream. skip this step if you want a thick, Greek-like yogurt. If you want it thick, do not mix can. open and scoop the 'cream' out and save the water for another purpose.
 Make sure your coconut milk is well whipped (by either shaking or whipping with fork. especially if you are seperating it from the water.)

Pour into container. Add 1 teaspoon of jam and 1 teaspoon of apple sauce and mix well. taste, and add more if desired.

pop lid on and leave in fridge for preferably one day.

Enjoy!

I love that this has the consistency and creaminess of real yogurt. Its also super versatile as you can literally put any sort of fruit you want into it.  Also, how easy is that?!

Coconut milk is packed with awesome nutrition, so sit back and enjoy eating/feeding your little knowing you aren't filling up on 'nothing'!


Saturday, June 2, 2012

Oat Flour... Where have you been all my life?


 I have been learning a lot lately. Isn't that how it always goes?

One of the things I learned today makes me very happy... because seemingly odd things can make me giddy.

 Oat flour.

Grind up oats (regular, not quick.) and replace it in any recipe that calls for flour. It has a sort of light nutty taste, but it's very delicious and works very well! As a family who strive for gluten free options, this is a very awesome thing to know. I feel much more relaxed knowing i can throw some oats in my blender, rather than scouring the stores to find alternative flours that aren't always nice on the wallet. You can bet I will be baking with this from now on! not to mention how much healthier it is in comparison to the standard options. (hello fiber?) 

I baked with it for the first time this morning. I made simple gluten/dairy/egg free banana muffins for Mackynzie, okay... and for myself, to enjoy. they were a hit! I even think Cody will like it when I make him something without bananas in it.


Oh ya, putting your baking ingredients in a blender is awesome. Some of you may be thinking that this was so last year and I should know this, but hey, better late than never!

Saturday, April 28, 2012

Vegan Pizza Awesomeness


 This pizza is so awesome, I just had to share with you all real quick! ...And it's vegan!

 It is so simple and so delicious! Creamy, savory, a tiny bit of crunch... If I had to choose one thing to eat forever right this second, it would be this.

I was shopping for our hectic schedule, and needed something quick and easy that could be thrown together despite the chaos and boxes that goes along with moving. I picked up some Nan bread with no idea of the beautiful creation I would soon be nomming on.

So, enough with the talking. Here is how I made it:


I took one piece of Nan bread, brushed it with melted butter (This part wasn't vegan, but i will replace the butter once my coconut oil comes in. you could even use water or olive oil.) and popped it in the oven, pre heated to 395F for approximately two minutes (you just want to warm it up.).

Then I washed and chopped some red and green bell pepper, onion, garlic, fresh mushrooms, and although its not in the picture above because i just laid it on the pizza (which is still good, but this is better.), about a handful of chopped/ripped spinach, and sauteed it all in pan with butter (again, i will use coconut oil to make it fully vegan when I get it!) until things started turning golden.

you only want enough veggies etc to cover your Nan bread, but you want a good amount. Also, while you're frying, your bread should be out. don't burn your bread!

Once everything was sauteed, I spread some *herbs and spices* tomato paste on my Nan bread, then evenly spooned out my veggie mix. Herb and spices tomato paste is very important. It really makes the pizza..

I popped it in the oven for about 2-4 mins (you are just giving everything a little bake since its all cooked. Just to crisp up a bit. So do not exceed 4 mins!)


I took it out of the oven, put it on a plate, and went into a state of bliss as I enjoyed this beauty with a nice cold glass of coconut milk. Om Nom Nom...


And that, my friends, is how you make my awesome Vegan pizza. If you try it, let me know. Also let me know what you add to it! My next one will have some zucchini...

Thursday, February 23, 2012

Paleo Pizza


 Tonight, Mackynzie and I needed something fun to do, and I wanted something easy and delicious for dinner. I was in the mood for filling, carb-like food, so we decided to try out our first primal pizza with a more traditional crust (we have made it before using cauliflower 'rice').

 I grabbed some random ingredients from my-'I need to go to the store'- kind of stocked fridge, and made a simple, easy, yummy pizza!


PALEO PIZZA CRUST (and Pizza recipe):

Preheat oven to 375 degrees.
  • 3 eggs
  • 1 cup of full fat coconut milk Or approx 3/4 C of almond milk
  • 1 crushed garlic clove
  • 2 tsp garlic powder
  • 1/2 tsp baking soda
  • 1/2 cup coconut flour
 Mix eggs, milk, and both garlic's together gently. Add baking soda and coconut flour to egg mixture. (sift your coconut flour!) Mix until combined.

spread out into a pizza shape on your pan. (it will be more like a thick batter, not dough like.) *Remember that coconut flour recipes don't 'grow', so how thick you spread it, will be how thick your crust it!*
  Place on greased, non-stick pizza pan (or parchment paper)

Bake for approximately 20 minutes, or until golden brown. 

Once brown, take crust out, and carefully flip your crust.

 Spread pizza sauce on (we used tomato paste mixed with herbs, salt and pepper, and a bit of garlic powder.), and top with whatever your taste buds desire! (We had farmer sausage, tomatoes, black olives, avocado, and a tiny bit of cheese. The avocado acts as a cheese substitute, in my opinion, because it's so rich and creamy. (we only used cheese because that was the last of the block I needed to get rid of!) random toppings, but it was what was in the fridge!)

Turn oven to *broil* and place back in oven for approximately 10 minutes. *watch it though, you don't want to burn your edges!*

Take out, cut up, and ENJOY!

Saturday, February 18, 2012

Banana-Chocolate Chip Paleo Muffins (Or just Banana...)


 Paleo muffins?! No way!

Don't be so shocked! Some of us on the caveman diet still love to bake! (I have quite a few baking recipes that I will be posting asap!!)

For those of you who were not shocked, and just want me to get to the dang muffins already, here we go:

Banana-Chocolate Chip Paleo Muffins (Or just Banana Muffins...):


  • 2 large size eggs
  • 4tbsp Melted coconut oil, or butter
  • 2 1/2 tbsp maple syrup (add a bit more if you are not using chocolate chips. if you don't like sweet things all that much, don't add any. Or, add more if you like. OR you can use honey (if you don't have little ones under/around 1 year), or other natural sweeteners.)
  • 2 pureed over-ripe bananas (I have a bullet, so I just popped them in there, and made them smooth. You can do this with a blender, OR you can just hand mash them. I didn't want any lumps of banana this morning, so this is just what I did!)
  • 1/2 tsp baking soda
  • 1/4 tsp crushed sea salt
  • 1/2 cup coconut flour
  • handful of chocolate chips. (eye-ball it. You know what you like.)
  • Nuts, if you like them. (we don't bake with nuts often, so we don't add them.)

Directions:

There are two ways you can do this. 

 1 - put everything in bowl and mix.

2 - (what I do.) Crack eggs into your bowl, and give a light whip so they are somewhat combined. Add your syrup and *melted* coconut oil/butter - give a little whip again to combine.
  Add your banana puree or mush (or, if you are not pureeing them, just put them in the bowl and mash them with the eggs etc in there... Or do it separately, its completely your call.)  and give a little whip to combine it all again.
 Sift in your coconut flour, then add your salt, and baking soda - mix with wooden spoon until combined.
Add your chocolate chips and/or nuts if you're adding them.

Preheat oven to 350.

use ice cream scoop, or spoon, to scoop a big dollop of batter into a **greased** muffin tin. (or use cupcake liners.)

Bake for 28-30 mins. Cool, pop out and eat them all... 

TIPS AND EXTRA INFO:

  • If you have baked plaeo-style before, you will notice that I only use two eggs. This may confuse you, as paleo baking usually requires 6+ eggs. Worry not, this is not a typo. I have been playing around and making dozens of muffins to find the right consistency. I think I found it. (don't hold me to this yet, as I need to try and do a recipe without chocolate chips first, to see if what I did was right!)
  • If you have baked with coconut flour before, you will noticed the muffins tend to come out mushy. This one is not mushy. (see above bullet.)
  • These muffins don't rise, So fill your tins appropriately.
  • The bake time is quite long for muffins, but they are mushy if you don't wait it out. Some ovens may be done in 17 mins, but I have a hot oven, and I leave mine in for 30 mins, or else i find my centers are just too moist.
  • These freeze well, so make some, and freeze them!
  • Paleo muffin batter doesn't make as many muffins as you may be used to, with wheat flour. Don't be fooled, these are FILLING because they are packed with so much goodness. Just 2 of these bad boys with my tea or green smoothie, and I am stuffed for breakfast! 
  • Some people may be going "whoa, Rainbow. Chocolate chips are NOT paleo." -This is true. But, a little dark chocolate is A-okay in most paleo eyes, and you can get vegan/gluten free chocolate chips. (these in particular, are just normal chips. We don't always sweat the small stuff, and we are not crazy strict, so this is okay for us. It;s not like it's all the time ;) )


Eat, and enjoy! 


Please feel free to ask any questions (I may have let something out, you never know!) and be sure to keep an eye out for more muffin recipes! 


Sunday, February 12, 2012

Home Made Chicken-Vegetable Soup, with Home Made Bone Broth


**I have updated how I do these recipes slightly, now that i'm further down my holistic eating path. Please check that out for adjustments to make these as optimally nutritious as possible. click HERE**

 Nothing can compare to home made soup. If you have ever had it, you know this, and you probably discovered this by trying to find something that would be the same, because you didn't know how to make your own.

 I avoided making my own soup (never mind my own broth) for a long time, because I thought it would be hard and complicated. When I finally did it, I realized its one of the easiest things to make!

I keep broth and/or soup in my freezer constantly. It really comes in handy. I will talk more about how I freeze it, and what I do with it in a minute.


 The gist- Soup is good. Homemade soup is EPIC. Keeps you healthy, keeps you full, and is PACKED with nutrients. Here is my recipe (paleo of course!):

*this recipe is for a chicken approx 6-7 lbs. Use water/vegetable amount to match the size of your chicken.*

Home Made Bone Broth:

Buy a whole chicken, cook it, and eat it as an awesome meal, however you like.

 When you are done, you are left with the bones, and the left over meat. (that should be still on the chicken.)

Strip the meat off the bones of your chicken (that you didn't eat for dinner. I have enough for dinner, lunch the next day, and enough for the soup.), and set aside in a bowl/container. This will be the meat you use for your soup. You have to really get in there and pull apart that chicken. *Don't throw anything away! (unless you still have some 'bits' left inside the cavity of the chicken (heart or something.), and you don't wish to use those. They are full of flavor, but I choose to chuck them. Little past my comfort zone.) there usually wont be anything to throw away.*
  Lift up the chicken, and be sure to get underneath, and in all the nooks. You don't need a giant bowl, it goes a long way. You will learn how much you like in your soup.
 Wrap up your chicken that you have set aside, and put it in the fridge. You deal with that much later.

Put all the bones etc in a soup pot, and fill your pot with filtered water. (enough to cover approx 2-3 inches above your bones.)

Add veggies to your bones. a big carrot, or two medium ones, an onion, 3-4 cloves of garlic, and 2 celery stalks. (these are very roughly chopped. Big pieces, and you don't even need to take stems/ends off, or peel if you don't want to. Except your onion and garlic. peel your onion, and cut in large chunks. peel your garlic, and give slight smash with the side of your knife.) Don't worry about these veggies. You won't be using them for anything besides flavor. they get left aside with the bones.

Add spices. I just eye-ball it to my taste. I add a bit of thyme, 2 bay leaves, sea salt, pepper, and oregano. (probably about 1/2 a tsp of oregano and thyme..)


Set your burner on med-high heat (on the higher side. 7 or 8, if your stove does the number thing.) Once it starts to boil turn it down to med-low heat (about 3.).

Simmer for about 4-5 ish hours. This is really up to you. You could simmer it all day on low if you want, but i prefer about 4-5 hours. You can tell its done, when the bones have separated from the rest of the chicken, and your veggies are super mushy (onions are clear, garlic is mushy.) Taste it! If it tastes like chicken broth, and its been an hour or two, you could pull it off then. Add what you think is missing, and keep simmering if you like.

Extra step: After its done, turn off element, and leave on stove to cool. when its cool enough to touch, place pot in fridge-with a lid- over night. This allows everything to combine more, and the flavor is better. (still fine if you skip this though.)

Strain your broth into a container, and store, or use in soup right away.


Home Made Chicken-Vegetable Soup:

Pour the broth that you just made (the day before...or not), into your soup pot. add equal amounts of filtered water. ( I just pour with a big ol' measuring cup that holds 4 cups. I usually have about 2 1/2 measuring cups of both broth and water. i usually add about an extra cup of water.)

Chop and add vegetables. 3 carrots, 4-5 celery stalks, onion if you like it-the amount is up to you-, 2 cloves of garlic (hit them with the knife again like mentioned in the broth recipe.), zucchini if you like it **Don't add zucchini until the last 10-15 mins! it dissolves if you put it in too early.**


Shred and add your chicken you put aside from your bones.


Add spices. (less then you added in the broth.) 1 bay leaf, oregano, tiny bit of thyme, sea salt and pepper to taste.

Heat on med-high (again, on the higher side.). When it starts to boil, you can do one of two things: If you have time, and will be home, turn down to med-low, like you did the broth (3 or 4) and simmer (stirring very occasionally.) until veggies are your preference of softness, and tastes as desired. I leave this for 2, even 3 hours. Or, you can cook on medium heat (5-5 1/2) for approximately an hour, until your veggies are desired softness.
* It's always better to go a bit slower, to let the flavors incorporate a little more, but you don't always have time!

Enjoy a bowl of your 100% from-scratch soup! (It really is that simple.)


**this recipe is paleo, because we are paleo (obviously..). If you eat noodles, you can add 1/2- 1 cup egg noodles to your soup for chicken noodle.(you really don't need them though! Its fantastic and hearty without!)**

To Freeze:

I freeze mine like this:

 Ladle soup into muffin tins. Make sure there is a good ratio of veggies and meat,  to broth. Place muffin tins in freezer over night, or for a few hours. Once frozen, pop out soup 'pucks' and put into a container.
 Take extra soup broth you have left over, and either place in muffin tins, or put it in ice cube trays. (place in freezer, and then put in container and put back in freezer, like you did the soup.)


Heat a couple soup pucks over medium heat when desired, and serve. (This is AWESOME for toddlers!)

Add your extra broth cubes/pucks if you want more broth, or, use them to flavor other recipes.

(I pop 2-3 cubes of soup broth in with peas and ham/bacon, for a quick, yummy lunch for my little one!)

*great to use if someone is sick too.*


Extra Tips:

If your bones from your broth still have a good amount of stuff on them, and your veggies are still whole etc, add a few more spices and celery, and do another broth with it! Then, freeze your broth in cubes or pucks, so you have pure bone broth at hand for future soups/recipes/sickness.


If you don't like to eat mushy vegetables, take your soup off the burner while they are still a bit firm. They will soften up when they cook a second time after you freeze them. If you want to eat a bowl then (for dinner/lunch or whatever), set aside the amount you want to keep cooking a bit more.

I hope you enjoy this as much as we do!


Thursday, January 12, 2012

Meat 'Cupcakes' with Sweet Potato 'Icing'


 Don't be afraid. I know the pairing of 'cupcakes', 'icing', and 'meat', sounds extremely questionable, but I can ensure you they are yummy!

 For those of you who don't already know, our family is living a paleo life style, so I am trying new recipes as often as I can. It can be hard to find good paleo recipes, so I have decided to start collecting them here!

 *you don't have to be paleo to enjoy these recipes!!

Please keep in mind, i take recipe ideas, and make them up as I go along. so you can do the same and skip/decrease/increase the ingredients if you like.

Meat cupcakes with sweet potato icing:

  •  1 lb ground beef
  • 1 egg
  • 1/2 an onion finely chopped
  • 1 stalk celery finely chopped
  • 2 clove garlic finely chopped
* Next time, I will pop the onions, celery, and garlic into the bullet (or food processor) and make a paste. We(Cody especially) are not a huge fan of having the little chunks of veggies in our meat.*

Okay, So like I said, I winged this recipe, so I don't have exact measurements. I just gave the following a good shake into my meat mixture according to my taste preference. (for those of you who need measurements, i will give you my best guess.)

  • sea salt (abo 1 tsp)
  • black pepper (abo 1 tsp)
  • thyme (abo 1 tsp)
  • oregano (abo 1 tsp.. maybe slightly over, because I like it.)
  • a good squirt of ketchup (close to 1/4 C)
  • 1 tbs butter

 You can also add Worcestershire sauce, a tad of honey, chili pepper flakes. (since I cook for a  toddler, I didn't add these.)

 **Basically, this is just a meat loaf recipe, so if you have a favorite meat loaf recipe, you can just use that!**

Mix all ingredients together with clean hands until well combined.

 pre-heat oven to 350F


Place meat mixture in non-stick muffin pan, or use paper liners (NOTE: I don't recommend greasing the muffin tin. I have a very good/new non-stick pan, and I greased it anyway. they were swimming when the came out! (still yummy, but needed a good pat and drip off.) )

Pack your meat mixture into the muffin tin very well. (I only filled them basically, and the sort of shrunk. which was fine, but i suggest packing them a little more.)

Bake for 20 minutes, or until meat loaf is done.


Sweet potato icing:

  • 1 large sweet potato
While meat loaf is baking, peel and cut your sweet potato into small chunks  (about an inch and a half both ways.- they will cook faster.)  add water to cover sweet potato, and boil until soft when poked with a fork.

 When Sweet potato is done, drain water, and mash. Add abo 2 tbsp butter, and a splash of your milk of choice. (we use almond.) -Just like you're making regular mashed potatoes!

 If you'r fancy, place mashed sweet potato in a plastic baggy, cut a small part of one of the corners off, twist up the top, and ice like a cupcake. -If you'r not, grab a spoon, and slap some sweet potato onto you'r meat muffin.

EAT IT. They are really good! I served ours with broccoli.


 I ended up needing a really quick dinner two days later, and I couldn't use our stove or microwave( i hate microwaves anyway haha), these made a really yummy cold dinner later! Or snack!

From our family to yours - Enjoy!!

Recipe I got inspiration from: HERE